Part 2: Introducing Sign Language MNIST
Welcome to the second part in out tutorial in using Vitis AI with Tensorflow and Keras. Other parts of the tutorial can be found here:
- Introduction
- Getting Started (here)
- Transforming Kaggle Data and Convolutional Neural Networks (CNNs)
- Training the neural network
- Optimising our neural network
- Converting and Freezing our CNN
- Quanitising our CNN
- Compiling our CNN
- Running our code on the DPU
- Conclusion Part 1: Improving Convolutional Neural Networks: The weaknesses of the MNIST based datasets and tips for improving poor datasets
- Conclusion Part 2: Sign Language Recognition: Hand Object detection using R-CNN and YOLO
Our Sign Language MNIST Github
In this part of the tutorial, we will be introducing the dataset and the tools and we will also look at how to run the program. All code is available open source on our github.
Our chosen dataset is the Sign Language MNIST from Kaggle. It is designed as a replacement for the famous MNIST digits database as MNIST is often considered too simple. We also believe this is a far more pragmatic dataset for embedded AI and hope this can provide the ground works to make embedded devices more accessible for everyone. Each image is a 28×28 greyscale image with pixel values varying between 0-255. There are 27,455 training cases and 7172 test cases. There were originally 1704 colour images, but to extend the database, new data was synthesised by modifying these images. The exact strategies can be found on the webpage.
The tools we are using:
- TensorFlow: Developed by Google. TensorFlow is a very popular open source platform for machine learning. We assume the user has a basic understanding of the TensorFlow toolset.
- Keras: An easy to use front-end API for TensorFlow. Its flexibility allows for quick experimentation, making it perfect for getting started with FPGAs. We also assume that the user has some basic knowledge of Keras
- Vitis AI: Vitis AI is part of Xilinx’s Vitis Unified Development Environment, which aims at making FPGAs accessible for software developers. The tool takes in TensorFlow models and converts them to run on the Deep Learning Processing Unit (DPU), which is the deep learning accelerator that is placed on the FPGA fabric.
With the introductions out of the way let’s get installing:
- We don’t need to install each software individually as the Docker image that Vitis AI comes with supplies the software we need. Instructions to install Docker and Vitis AI can be found here
- Clone the Github repo for this project into a folder that we will now call:
<cloned-directory>
- In the cloned directory, extract the Sign Language MNIST dataset from Kaggle
That’s it for installation. We can now focus on running the system and to get started we are going to use the automated scripts. In later tutorials, we will go stage by stage as to what each part of the script does, but for now we will quickly go through the whole process.
- Launch a terminal in the repo and start the docker:
cd <Cloned-directory>/sign_language_mnist

sudo systemctl enable docker

<Vitis-AI-Installation-Directory>/Vitis-AI/docker_run.sh xilinx/vitis-ai-cpu:latest
- We then need to install Keras in the docker
sudo su

conda activate vitis-ai-tensorflow

pip install keras==2.2.5

conda install -y pillow

exit

conda activate vitis-ai-tensorflow
Our program verifies its functionality in two ways. First it takes a sample of the test images and runs them on the FPGA. By default, it will run ten images. Second, we allow a user to input their own image is by placing an image inside the test folder. We have already supplied two test images for you to try, but feel free to add more.
- Finally, to run the process:
./run_sign_language_mnist.sh
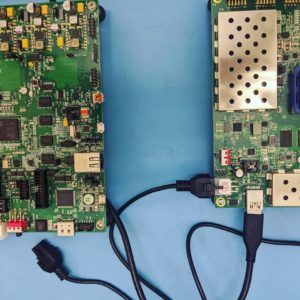
This will step through the entire process of creating the Neural Network model for our FPGA. At the end of the process, it will place all the files we need in a folder called deploy. To run our Neural Network we need to place the DPU on the FPGA. Fortunately, Xilinx provides pre-made images and instructions here.
- Turn on the FPGA and access it through the UART port
- Through the UART port we can configure the settings of the FPGA to access the board via SSH;
ifconfig eth0 192.168.1.10 netmask 255.255.255.0
- We can then connect to the board as shown in the user guide
- Now we have the DPU on the FPGA fabric we need the relevant libraries to run it, which we can get through here. Transfer the package onto the FPGA via SCP:
scp <download-directory>/vitis-ai_v1.1_dnndk.tar.gz root@192.168.1.10:~/
- Then using the terminal through the board:
tar -xzvf vitis-ai_v1.1_dnndk.tar.gz

cd vitis-ai_v1.1_dnndk

./install.sh
- We then need to transfer over the deploy folder
scp <Cloned-directory>/sign_language_mnist/deploy root@192.168.1.10:~/
- Finally, we can run the file:
cd sign_language_mnist/deploysource ./compile_shared.shpython3 sign_language_app.py -t 1 -b 1 -j /home/root/deploy/dpuv2_rundir/
- We should get the following results:
Throughput: 1045.72 FPS
Custom Image Predictions:
Custom Image:  test_b  Predictions: U
Custom Image:  test_c  Predictions: F
testimage_9.png Correct { Ground Truth:  H Prediction:  H }
testimage_6.png Correct { Ground Truth:  L Prediction:  L }
testimage_5.png Correct { Ground Truth:  W Prediction:  W }
testimage_1.png Correct { Ground Truth:  F Prediction:  F }
testimage_2.png Correct { Ground Truth:  L Prediction:  L }
testimage_7.png Correct { Ground Truth:  P Prediction:  P }
testimage_4.png Correct { Ground Truth:  D Prediction:  D }
testimage_3.png Correct { Ground Truth:  A Prediction:  A }
testimage_0.png Correct { Ground Truth:  G Prediction:  G }
testimage_8.png Correct { Ground Truth:  D Prediction:  D }
Correct: 10 Wrong: 0 Accuracy: 100.00
Looks like we correctly predicted all the results from the dataset, but things did not go quite right for our custom images. In the next tutorials, we will be doing a deeper dive into what these automated scripts actually do and how we can create models for use on FPGAs. The first thing we will do is look at transforming our data for use by TensorFlow and creating a basic Convolutional Neural Network.


I read your all tutorial about VITIS AI USING TENSORFLOW AND KERAS TUTORIAL. They are excellent. Thank you for this tutorial series. I have a question about OS which you used on your host. Which OS did you use on your host like Linux or windows? I think that I must have a linux OS to set up host.
For this tutorial we used Ubuntu. I would recommend only using an OS that is offically supported by Vitis Development Environment:
https://www.xilinx.com/html_docs/xilinx2020_1/vitis_doc/aqm1532064088764.html
Thanks for your tutorial. I am running Vitis on ubuntu 18.0. I try to follow the first step and I am having some issues. After running the command “/Vitis-AI/docker_run.sh xilinx/vitis-ai-cpu:latest”, Vitis creates a space called “/workspace” and only in this space the command “conda activate vitis-ai-tensorflow”.
after “exit” conda activate vitis-ai-tensorflow does not work any more. is there something that I am missing?
Thanks a lot
Hi. Do I have to install the Pre-built Docker or Docker from Recipe? Can you please help me? Sorry for the newbie question.
I’m getting errors running this example. It occurs when running ./run_sign_language_mnist.sh. During this process the frozen graph is not generated due to an list Index Error. Anyone else have this issue?
Hi Tyler,
Just to say we are working on a new version which will cover the latest Vitis AI, so check back soon to see if that fixes the bug.
What fpga boards can be used for this process? zcu102, zcu104 seem quite expensive for a solo project. Will these work on EDGE artix or spartan boards?
Technically any FPGA board that supports the tool chain can be used with this project, but you will need to check with the board manufacturer to see, if they have the correct BSPs for Vitis AI.