Part 2: Quick Start Guide
This is a quick start tutorial designed to show how to get started using BeetleboxCI and Vitis AI, in which we will cover the following:
- Designing a Neural Network – Designing a simple neural network in Tensorflow and Keras.
- Training a Neural Network – We will show how this neural network can be trained through BeetleboxCI.
- Converting the model and preparing for FPGAs – Through BeetleboxCI we will also be converting the model for use on FPGAs as well as creating the files to run on the board.
The accompanying git repository for this tutorial may be found here.
Overview
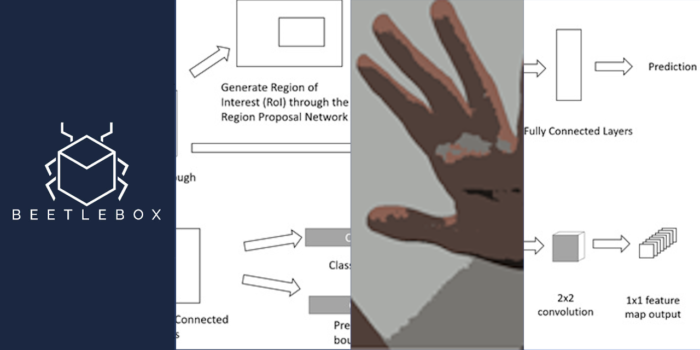
A beginners guide to getting started with AI on FPGAs for embedded systems. This tutorial uses Xilinx Zynq series FPGAs and the Xilinx Vitis AI tool as well as Tensorflow and Keras. The tutorials accompanying this code can be found on the Beetlebox website or on our github.io:
The tutorials are focused on Sign Language recognition using Vitis AI to translate models built in Tensorflow and Kaggle, explaining both the theory of why and how we use FPGAs for AI and the practise of implementing it. The dataset was chosen because it is small enough to allow for quick training on CPUs. This is the second in a multi-part series, but is also the perfect place to begin:
- Part 1 – Introduction: Why use FPGAs for AI? Why Continuous Integration for FPGA technology.
- (Here) Part 2 – Quick Start Guide: Get going in twelve simple steps.
- More coming soon…
Tools we are using
- Vitis AI: Vitis AI is Xilinx’s development environment for AI on FPGAs.
- BeetleboxCI: BeetleboxCI is the Continuous Integration software specifically designed for FPGA design. Our free version provides enough hours to run through this tutorial and you can signup free from the website.
- Github: Github is a git repository service that can be connected to BeetleboxCI to create an automated workflow.
Pre-requisites
- A GitHub account.
- A BeetleboxCI account that is linked to your Github account. If you did not link it when creating your account, you can do so following this tutorial.
- A kaggle account to download the required dataset.
Sign Language MNIST Dataset
This tutorial uses the Sign Language MNIST dataset from Kaggle. It consists of the alphabet represented in American Sign Language (excluding J and Z which require motion to represent). It is designed as a drop-in replacement of the famous MNIST dataset and uses the same 28×28 pixel format with 27,455 cases for training and 7172 cases for testing.
Tested Environment
- OS: Ubuntu 18.04
- Vitis AI version: V1.4
- FPGA used: Zynq Ultrascale+ series ZCU104
- Tensorflow version: 2.3
- Keras version: 2.2.5
BeetleboxCI Quick Start Guide
Let’s get our AI up and running on BeetleboxCI within five minutes.
- Create a new git repository, which we will call
sign-language-mnist. - Clone the accompanying git repository for this.
git clone https://github.com/beetleboxorg/sign_language_mnist.git- Mirror push the cloned repository to your new repository.
cd sign_language_mnist
git push --mirror git@github.com:<yourgitaccount>/sign-language-mnist.git- Remove the cloned repository.
cd ..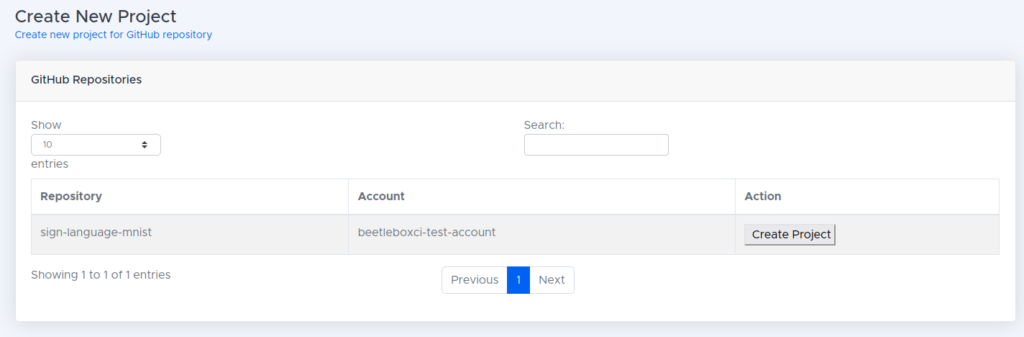
rm -rf sign_language_mnist- Login to BeetleboxCI. In projects click on the button labelled
Add Project. - We should now see
sign-language-mnistlisted in our repository. Click the button labelledCreate Project
- We now need to upload the dataset for training and testing. Visit the kaggle page and download the dataset.
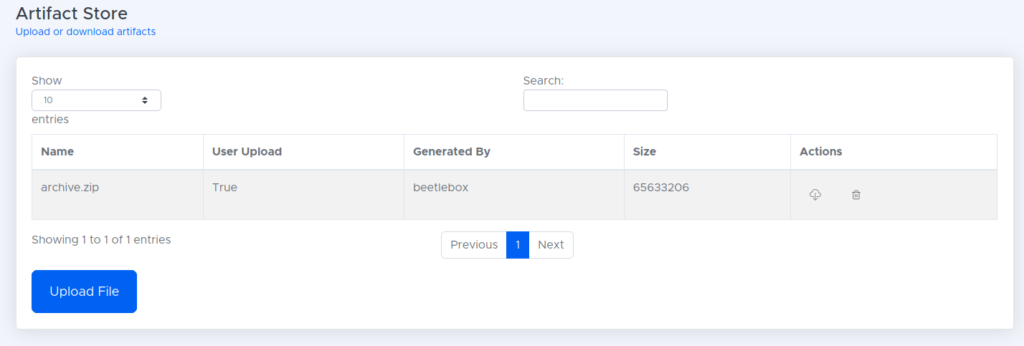
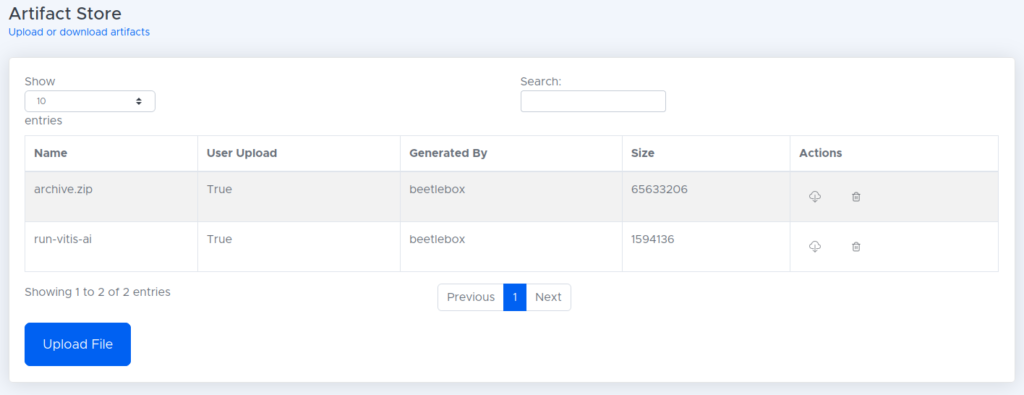
- Go to the
Artifact Storeand click the button labelledUpload your first artifact. - In the file upload page, choose the file downloaded from Kaggle, which should be called
archive.zip. Do not unzip it. Give the file the artifact type ofMiscellaneous. Wait for the file to finish uploading, where you should be taken back to the Artifact Store:
- In our projects, we should now see the sign language MNIST project. Click the play button to run the project.
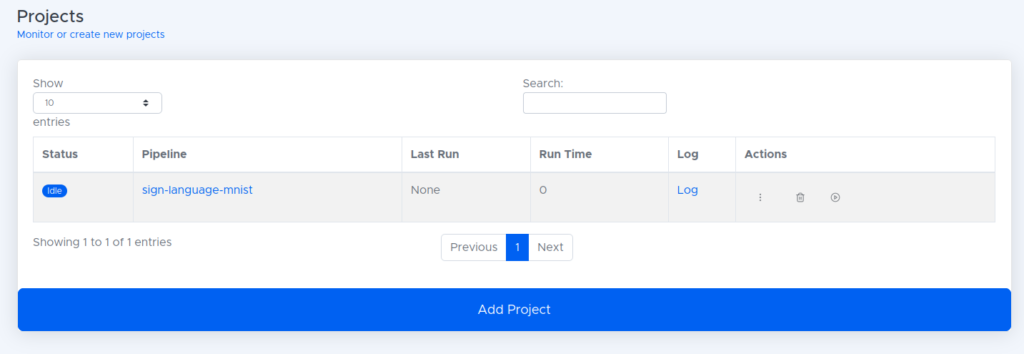
- After about three minutes, the project should successfully complete.
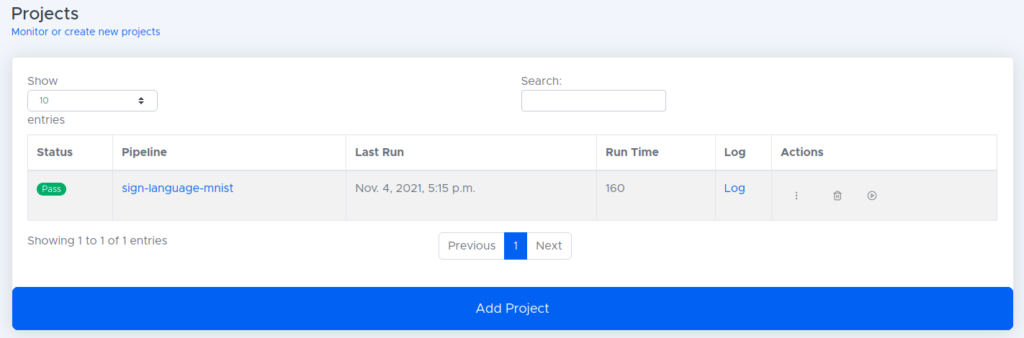
- The files needed to run this project on our FPGA are then stored in the artifact store.
In twelve simple steps, we have setup our code and data, trained our neural network, converted the model and prepared for use on a FPGA, all on a single pipeline.
Running on the FPGA
Once we have downloaded our model from BeetleboxCI, we then need to set up our FPGA. To do this we first need to flash an image containing all the hardware we need onto the FPGA. Fortunatly, Xilinx provides a pre-made one and instructions on how to flash an image in the Vitis User Guide found here.
We need to ensure we can successfully boot and connect to the FPGA using SSH as outlined in the user guide. This may involve configuring the boards IP through ifconfig:
ifconfig eth0 192.168.1.10 netmask 255.255.255.0We then need to copy the files over that we generated in the deploy folder
scp <Cloned-directory>/sign_language_mnist/deploy root@192.168.1.10:~/Finally we can run the file:
cd deploy
python3 sign_language_app.py --model sign_language_mnist.xmodel --image_dir images --threads 1 -s ./test_resultguide.json
We should see a result like so:
Throughput: 1045.72 FPS
Custom Image Predictions:
Custom Image:  test_b  Predictions: U
Custom Image:  test_c  Predictions: F
testimage_9.png Correct { Ground Truth:  H Prediction:  H }
testimage_6.png Correct { Ground Truth:  L Prediction:  L }
testimage_5.png Correct { Ground Truth:  W Prediction:  W }
testimage_1.png Correct { Ground Truth:  F Prediction:  F }
testimage_2.png Correct { Ground Truth:  L Prediction:  L }
testimage_7.png Correct { Ground Truth:  P Prediction:  P }
testimage_4.png Correct { Ground Truth:  D Prediction:  D }
testimage_3.png Correct { Ground Truth:  A Prediction:  A }
testimage_0.png Correct { Ground Truth:  G Prediction:  G }
testimage_8.png Correct { Ground Truth:  D Prediction:  D }
Correct: 10 Wrong: 0 Accuracy: 100.00