Welcome to the 2020.1 version of getting started with computer vision on Vitis on Zynq. The release of 2020.1 saw significant changes from the old 2019.2 version and we thought it would be useful to update this tutorial to reflect the newer version. We will be covering two different methods: a quick start way and a more scripted build approach. This tutorial will be a multi-part series covering the basics of getting started with computer vision and Vitis. We will be covering:
- The quick start method
- The scripted build method using Petalinux and XRT (Current)
- How to build “Hello World” and understanding Vitis Development Flow
- Using OpenCV on the embedded system
We hope these tutorials will be useful for anyone looking to get into computer vision on FPGAs.
Part 2: Automation and Scripts
Why do we want to automate?
In our previous tutorial, we got our platform up and running fast through downloading the platforms for Xilinx. This is great if we are just looking to prototype something fast, but most of the time when we are using FPGAs we want to be able to customize our platform or run on a custom board. Whilst we can do this manually, it is much better if we can automate this process. It allows us to take a more iterative approach as we can start from a base that we know works and slowly modify that base with our custom hardware or firmware, allowing us to track exactly what changes are made so we can easily trace back what change caused an error on our system. This also allows teams to easily maintain a single build process. A team could have a centralized repo and each member could ensure they are doing the exact same build steps with the exact same system as their team members. An automated process can also be far more easily tested. We could have a Continuous Integration system that automatically builds the system and runs emulation tests on that system.
Pre-requisites
To get easily started on Vitis 2020.1, Xilinx has provided all the necessary files to create a project and get running on our board. We will be looking at downloading, installing and extracting these tools
Pre-requisites:
- A version of Linux officially supported by Vitis
- A development board officially supported by Vitis (packages for officially supported boards can be found here)
- Vitis 2020.1 (Installation instructions can be found here)
- XRT (Installation instructions can be found here)
- Petalinux 2020.1 (Installation Instructions can be found here)
- Balena Etcher or equivalent software
- Git
Our particular setup:
- Operating System: Ubuntu 18.04.04
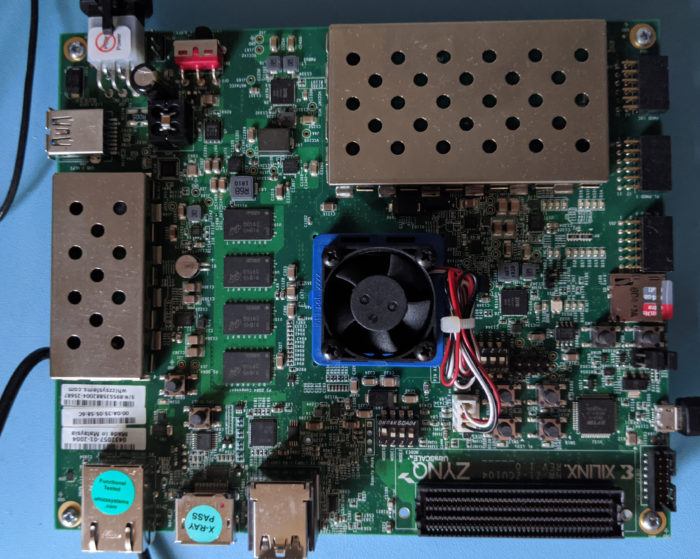
- Development board tested: ZCU104
Running Xilinx Official Embedded Platform
Xilinx provides the scripts they use to build their embedded platforms as open source, so we will be running them. In a new folder:
https://github.com/Xilinx/Vitis_Embedded_Platform_Source.git
cd Xilinx_Official_Platforms/zcu104_base/
We then need to source Vitis and Petalinux:
make all
The scripts will then run through the entire process which is split into three parts:
- Creating the Vitis hardware and packing it into a xsa hardware file
- Using the xsa file to create a software platform environment using Petalinux
- Making a Vitis platform through the XCST command line.
We then need to generate the sysroot which we can do by running:
make peta_sysroot
All we then need to do is open the project and run it on our board, but first let us take a brief look at how the makefiles work.
Looking at our hardware
Let us take a look at how it performs each of those steps. We begin by looking at the make all rule:
all: $(PLATFORM)

$(PLATFORM): xsa petalinux_proj pfm
	@echo 'Platform build complete'
xsa:
	$(MAKE) -C vivado PLATFORM=$(PLATFORM)
The first rule it runs is to call Vivado to create the platform using the following tcl script:
xilinx_zcu104_base_202010_1_xsa.tcl
Looking at this file won’t make much sense to a human, but we can use Vivado to open the xsa it generates. In a fresh terminal open Vivado:
source /tools/Xilinx/Vivado/2020.1/settings64.sh
vivado
In Vivado open the .xpr folder generated by our script:
<directory_to_repo>/Vitis_Embedded_Platform_Source/Xilinx_Official_Platforms/zcu104_base/vivado/zcu104_base/zcu104_base.xpr
Once it is open we can observe what hardware we are exactly building:
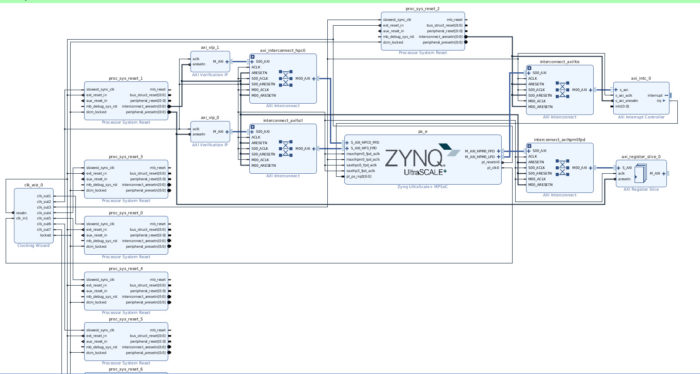
We can even customise our hardware then save the new files as a tcl script that can replace the base.
Looking at the Petalinux
Now we have generated the hardware we can take a look at the Petalinux part of our make:
petalinux_proj:
	$(MAKE) -C petalinux all XSA_DIR=$(XSA_DIR) PLATFORM=$(PLATFORM)
This calls the petalinux build command all held in the petalinux make file in the petalinux project folder. We can tell it is a petalinux project because of the .petalinux file type:
CPU_ARCH=a53
OUTPUT=../platform_repo/tmp/sw_components/
SYSROOT=../platform_repo/sysroot
all: refresh_hw kernel_config rootfs_config linux sw_comp bootimage
The all command runs the refresh_hw kernel_config rootfs_config linux sw_comp bootimage commands:
refresh_hw:
	petalinux-config --get-hw-description=${XSA_DIR} --silentconfig

sw_config: kernel_config rootfs_config

xrt:
	petalinux-config -c xrt --silentconfig

zocl:
	petalinux-config -c zocl --silentconfig

kernel_config:
	petalinux-config -c kernel --silentconfig

rootfs_config:
	petalinux-config -c rootfs --silentconfig

linux:
	petalinux-build
These commands consist of running the petalinux with the current petalinux project configuration. If we wish to modify the files we mostly look at editing the various config files which can easily be done through the petalinux interface:
petalinuxconfig -c <various settings>
Through these menus we can modify any settings and save the configuration files. In this tutorial we will not be modifying any settings so we can leave everything as the default.
Creating the Vitis project
The final stage of the makefile is to run the project in Vitis:
pfm:
$(XSCT) -nodisp -sdx scripts/${PLATFORM}_pfm.tcl ${PLATFORM} ${XSA_DIR} ${OUTPUT_PATH}
mkdir platform_repo/${PLATFORM}/export/${PLATFORM}/sw/${PLATFORM}/pre-built/
cp -rf platform_repo/tmp/sw_components/src/${CPU_ARCH}/BOOT.BIN platform_repo/${PLATFORM}/export/${PLATFORM}/sw/${PLATFORM}/pre-built/
This command runs Vitis through the XSCT command line and runs xilinx_zcu104_base_202010_1_pfm.tcl file:
domain -name xrt -proc psu_cortexa53 -os linux -image $SW_COMP/src/a53/xrt/image
domain config -boot $SW_COMP/src/boot
domain config -bif $SW_COMP/src/a53/xrt/linux.bif
domain -runtime opencl
domain -pmuqemu-args $SW_COMP/src/qemu/lnx/pmu_args.txt
domain -qemu-args $SW_COMP/src/qemu/lnx/qemu_args.txt
domain -qemu-data $SW_COMP/src/boot
#domain -sysroot ./src/aarch64-xilinx-linux

platform -generate
The script simply takes the steps needed to generate the platform so we can immedialy create an application project using the platform.
Running our project
source <Vitis_install_path>/Vitis/2020.1/settings64.sh
source /opt/xilinx/xrt/setup.sh
We can then run Vitis:
Vitis
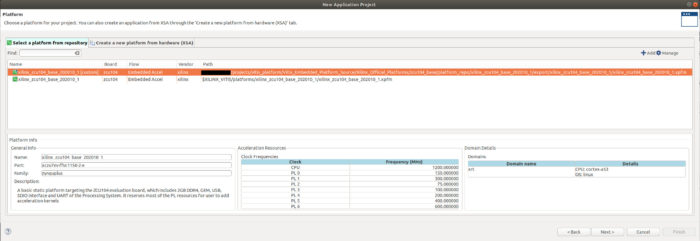
Create a new workspace like example_workspace_2 and then create a new application project. In the platform tab import the generated platform from:
<directory_to_repo>/Vitis_Embedded_Platform_Source/Xilinx_Official_Platforms/zcu104_base/platform_repo/xilinx_zcu104_base_202010_1/export/xilinx_zcu104_base_202010_1/xilinx_zcu104_base_202010_1.xpfm
In the Application Project Details tab, provide a name such as test_2. Then in the domain tab provide the following:
- Under “Sysroot path” select:
<directory_to_repo>/Vitis_Embedded_Platform_Source/Xilinx_Official_Platforms/zcu104_base/platform_repo/sysroot/sysroots/aarch64-xilinx-linux
- Under “Root FS” select:
<directory_to_repo>/Vitis_Embedded_Platform_Source/Xilinx_Official_Platforms/zcu104_base/petalinux/images/linux/rootfs.ext4
- Under “Kernel Image” select:
<directory_to_repo>/Vitis_Embedded_Platform_Source/Xilinx_Official_Platforms/zcu104_base/test_plat/Vitis_Embedded_Platform_Source/Xilinx_Official_Platforms/zcu104_base/petalinux/images/linux/Image
Now we can just repeat the same steps from the previous tutorial. For template applications select the “Vector Addition.” Under the “vector_example.prj” tab, change “Active Build Configuration” to “Hardware” and then hit the build icon.
When Vitis has finished compiling, it creates a .img file that we are going to flash to our SD card. It is held in the following directory:
<path_to_workspace>/example_workspace/vector_example/Hardware/package/sd_card.img
This file contains everything the FPGA needs to run our application. Launch balena etcher and select the “sd_card.img” file and then select the SD card, you wish to write to.
Once your SD card is flashed, check that the Zynq board is in “Boot from SD card mode” and that the board is connected to the host via USB. In the Vitis IDE select “Window” > “Show View”, then search terminal and hit “Vitis Serial Terminal.” In the “Vitis Serial Terminal” hit the add button to launch the “Connect to serial port.” Keep the default settings the same apart from the port, which will differ depending on the particular host computer.
Using the Vitis Serial Terminal, we can now run our program as follows:
cd /mnt/sd-mmcblk0p1/
source ./init.sh
./test_2 binary_container_1.xclbin
We should see the example successfully pass:
Loading: 'binary_container_1.xclbin'
TEST PASSED
Now we have successfully setup our platform from scratch using scripts, which forms a solid base for us to be able to modify and customise the platform as we need to. We can introduce new hardware or libraries into our build or we can setup complete automated testing from start to finish of any application we create. Next we will look at the different ways of emulating and running our program.