14 Nov

Ever put your Raspberry Pi inside a robot and wanted to be able to still develop without plugging it into a monitor? Have you had more than one raspberry pi that you wanted to update at once? Have two developers wanted access to one raspberry pi at the same time? If any of these situations are familiar to you or your team, you could benefit from DevOps for Raspberry Pi. In this tutorial series, we will be exploring how to automate Raspberry Pis through a software development technique called continuous integration.
We will be looking at how to get quickly started with setting up an automation server, how to communicate with a Raspberry Pi, how to successfully monitor them and update software.
Contents
All code used in these tutorials can be found in the following GitHub repository.
- Introduction (here)
- Part 1: How to setup continuous integration on raspberry pis.
- Part 2: Connecting and receiving data from sensors. (coming soon)
- Part 3: How to automatically monitor your Raspberry Pi with continuous integration. (coming soon)
- Part 4: How to use continuous integration to update your Raspberry Pi application. (coming soon)
An introduction to DevOps and automation
DevOps is a set of practises that get an engineering idea from the whiteboard, through to development, testing and finally deployed into the real world. It has become ubiquitous in the software engineering world, but it can have profound impacts on small devices, such as the Raspberry Pi.
The landscape of devices is changing. Today’s users expect devices that are not only smart, but also fast, safe and secure. Developing these devices on schedule and bug free are two of the greatest challenges facing engineers today.
The ugly truth about development, especially when it comes to teams, is that involves a lot of boring manual tasks. We want to be able to work on delivering new features to our next project, but just doing the exciting parts is a sure way for things to break quickly.
Introducing continuous integration
Let’s take for example, two developers working on a product. They both develop two different features. After a few months the deadline is approaching, but they finish their sections. They then try to combine their code and find that all their changes clash. Merging this code causes a huge amount of bugs to occur and on top of this the deadline is almost on top of them.
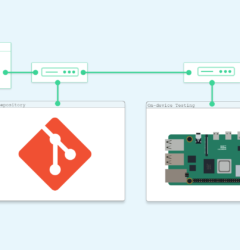
The best way for them to solve this problem is through what is known as Continuous Integration. Continuous integration is a DevOps practise that has developers regularly commit their code to a central codebase. This codebase is held in a Version Control System, such as GitHub or GitLab, and developers will push their code changes through at least once a day.
This avoids the merging problems previously, but a new challenge arises. How do we make sure that this codebase that is rapidly changing, functions as it should? This is where automation comes in. We can take that codebase and run builds and tests throughout the entire development process.
The benefits of continuous integration
By adopting continuous integration teams and even individual developers can benefit from the following:
- Quicker time-to-market. When the automation is powerful enough, developers can launch new features and updates without the worry of current systems breaking.
- Improved code quality. Manual testing causes inconsistency. Team members have to ensure that their setup is the same as everyone else and that they follow the exact same procedure. With automated testing, testing becomes more efficient so more of it can be done in a shorter period of time, improving the code.
- Faster bug fixes. If a developer introduces code that breaks some other person’s work, it can be instantly found and resolved.
- Better data. Testing is more than bug fixing. It is extracting information about your solutions to see how to improve the next iteration. More automation provides more data and better processing to see what is really happening.
- More efficient infrastructure. Engineers working solo will have all their files and data held locally. With proper continuous integration, all users can access generated filesand get the data they need without asking the whole team.
- Seamless teamwork. By having a shared automated process, developers all take ownership of the entire solution. It is far clearer what is and isn’t working as well as what needs to be achieved next.
- Finally, it improves innovation. Manual testing involves a lot of menial tasks that need to be improved. This eats developer time that could be better spent working on the next great feature. With continuous integration, developers are freed and can focus on what matters.
What are the challenges of DevOps on Raspberry Pi?
Continuous Integration has been revolutionary in general-purpose software engineering. It is rare to find a company that does not do it, but it is still not common practise for embedded software. In fact, a quick search on Google for ‘ci raspberry pi’ will mostly show how to setup web servers on a Raspberry Pi.
The reason for this is that continuous integration on Raspberry Pis and embedded software is far more complex than the average continuous integration flow. In a more standard setup a developer will work on a laptop and then push their code to work on a large web server. With Raspberry Pis there are a lot more challenges:
- Developing on a Raspberry Pi itself is a slow process that does not scale. Raspberry Pis are not powerful enough for serious Desktop use and getting that program across multiple Pis is hard.
- Simply connecting and managing multiple Raspberry Pis is far more difficult than web servers.
- Board farms that are needed for mass testing are difficult to make and scale.
- Setting up surrounding infrastructure for Raspberry Pis is difficult. A project may need a web server to communicate with a bunch of Pis to show the results to a user. How can this be achieved in an automatic flow?
- Many pi developer tools are not built to be part of an automated flow.
In this tutorial, we will show you how we can overcome many of these challenges and get the benefits of continuous integration.
How to solves these challenges with BeetleboxCI
This tutorial will focus on solving the problems that many developers have when trying to setup continuous integrationn for their Raspberry Pis. We will show practical methods for overcoming hardware limitations and how to setup entire infrastructures automatically.
To do this we will be using BeetleboxCI, a continuous integration tool specifically designed to overcome the challenges faced when using Raspberry Pis. It is designed to:
- Provide a tool that makes automation simple for devices like Raspberry Pi.
- Make connection and communication with boards simple.
- Solve hardware scaling through virtual platforms.